Powered by Blogger.
Nikkia Joy
Hi beauties!

So my Monday quickly turned from mundane to magnificent! The postman arrived with a beautifully wrapped present and it happened to be the gorgeous new Lorac Mega Pro Palette!


This one is a limited edition palette - that follows in the same footsteps as the previous Lorac Pro Palettes 1 & 2 - except it adds MEGA into the mix.


It's essentially the same size as two of the original palettes - and much like its predecessors it contains half matte and half shimmer shadows.


The packaging is the same suede/velvet type material that we are used to in our Lorac palettes - except this time its in a bright burgundy shade. To be honest I wouldn't be devastated if they changed their packaging material - yes its sturdy, lightweight, thin - but it gets filthy! Even a hint of powder and it just attaches to it like glue!And I probably would have also preferred the outer packing to be black - BUT it does come with an amazing big mirror and is very thin in design - which definitely outweighs the other stuff! 

 ______

Ok lets move onto the important stuff - the colours! There is definitely an interesting mix in this palette - very different to the previous two palettes. There is a generous mix of warm and cool tones, and also a good balance of brights. They have included a lot of rose and pink hues in there too, also a nice change from the originals. Theres an abundant supply of transition shades - which is nice, especially if your not a tip top blender - these will help smooth out the edges of the darker/brighter shadows really well.


The matte black is interesting - it has a very green undertone - all the while being clearly labelled as black. I love the shimmery obsidian - you could smoke out your entire lids with this, buff it out with one of the orange based nudes and it would make the perfect smokey eye for a night out. 


The neutrals would also be so easy to slap on for a day at the office or running errands - giving the lid a little extra without being too over the top.

Swatched below are 6 of the shimmer shades, they are all extremely pigmented - not surprised at all there - and the shimmer is really understated and nowhere near over the top.

Swatched left to right: Merlot, Indigo, Deep Teal, Granite, Copper & Vanilla


The matte shadows are also far from a let down - beautiful pigmentation, creamy to apply with minimal fall out - I think I'm in love!!!

Swatched left to right below: Espresso, Black (totally looks green doesn't it?), Dusty Plum, Mulberry, Camel & White


And then finally here is a picture comparing the Mega Pro to the original Pro Palettes 1 & 2. I would probably still stick with number 1 as being my favourite - it just has colours that are everyday generic and useable, and I definitely find myself reaching for it the most - thats not to say the number 2 and the Mega are not nice though - and it certainly puts a huge grin on my face having all three in my collection (but I am a little makeup cray cray!)


What do you guys think of the Mega Pro? Will you be picking it up?

The palette is limited edition - so you might want to jump on it quick. From what I have heard it pops up on Amazon quite regularly, and here in Australia you can still pick it up on eBay (but it will cost you a fairly hefty price - upwards of $150 - I'm assuming because of the exclusivity? Or maybe just because we always get ripped off on makeup here?!!)

BUY HERE: http://www.loraccosmetics.com/make-up_mega-pro-palette.html 

Talk soon xx


Share on:
Hi everyone! 

Hope your all having a lovely week! Todays post is all about nails! OPI has just released a stunning collection of holiday nail polishes in collaboration with the gorgeous Gwen Stefani!

I don't know about you guys but when my nails look good -  I feel good! And this collection is full of all sorts of feel good.
For starters Gwen is always effortlessly chic - and why would a nail polish range designed by her be any different from that?

The collection features 18 limited edition shades - there are several rich, warm reds (Gwen's signature colour), deep jewel, purple and amethyst tones, garnet, emerald, silver and gold. It also includes a range of unique glitters in shades of black and white with iridescent and chrome accents.

"I recommend wearing these festive nail laquers to instantly accessorise party dresses and elegant formal wear" - Gwen Stefani.

And the fact that the shade names are adorable and Christmas inspired? I mean come on! It's making me want to put up my Christmas tree right now!

So lets get down to business - for starters the packaging of the collection is stunning. It arrived in this beautifully packaged box with a printed wrap around featuring images of Gwen wearing colours from the range. I'm a sucker for packaging and Gwen looks incredible so I was of course immediately drawn!


Seeing as red is Gwen's signature colour we will start with them first! Included in the collection there is one neon coral red, 2 mid tone reds, a deep red and a shimmery red with good flecks throughout. To be honest I really couldn't tell too much difference between the two mid-tone reds - I really don't think you would need both of them but them but the others are outstanding! The lightest shade of red comes with an orange undertone and is aptly named 'Fashion A Bow'. It looks incredible when applied to the toes - it gives just the right amount of bright without being too scary. The deepest red 'In A Holidaze' would look incredible paired with a LBD and the shimmer red (Garnet seems to be the best word that comes to my mind when describing this colour) is going to be the best red that you could possibly ever wear to a Christmas party!


Left to right in the image below:
'Fashion In A Bow' - Bright reddish orange
'Whats Your Point-Settia?' - Poppy red
'Cinnamon Sweet' - Classic red
'In a Holidaze' - Deep, blue tone red
'Red Fingers & Mistletoes' - Deep red with gold reflects


Moving onto the purples - which I'm still finding myself impressed with after several weeks into my new relationship with this collection - and let me tell you the camera does NOT do these justice! Once again theres a range of shimmers and non-shimmers? (what the hell do you call them I am not a nail polish expert lol!) Rich plums and a Burgundy - we may be heading in Summer here in Australia but trust me I can still appreciate my deep plums!

Left to right in the image below:
 'Sleigh Parking Only' - very deep brown toned purple with jelly type appearance when on the nail
'First Class Desires' - deep blackish purple with gold relfects
 'I Carol About You' - Stunning deep purple
'Just Beclause'  - Pinkish Maroon
'Kiss Me or Elf' - Metallic Amethyst (this is my favourite colour of the entire collection!)


The collection also came with a forest green and deep charcoal chocolate. 'Christmas Gone Plaid' is the green and although I can't really see myself wearing it, its still a gorgeous deep green shade and oh so festive. 'Love Is Hot And Coal' is the charcoal and this one actually has a very slight shimmer to it which actually makes it less harsh and very pretty on the nail - it's also very nineties grunge - which we are all so into at the minute!


Now finally my absolute favourite part of the collection - the glitters and shimmers! I feel like all my Christmas's have come at once looking at these shades!

Left to right in image below:
'Snow Globetrotter' - Small white glitter pieces with iridescent hexagonal glitter chunks (these change colour as you move in the light - gold, aqua, pink, green)
'Rollin' In Cashmere' - Bright pearlescent gold
'Unfrost My Heart' - Cool metallic silver
'I'll Tinsel You In' - Small black glitter circles mixed with white square glitter chunks and strips
'So Elegant' - Metallic blue/grey hexagonal glitter chunks and small black glitter flecks
'Comet In The Sky' - Rainbow glitter pieces and hexagons with deep undertones


First up theres a straight gold and silver - love, love love the gold! Wore it on my my nails paired with the grey chunky glitter shade and got so many compliments! It not really a normal shade of gold either - its a lot brighter and pearlescent (so gorgeous!). The silver I tried on my toenails and due to being heavily fake tanned I wound up with what I refer to as 'space toes' and trust me it wasn't cute - probably keep this one for fingers only as it is so intense!


The glitter shades are unreal when you see them up close - the different colours they show in different lights and on different angles - plus the mixture of larger glitter chunks with small glitter shimmers - two words - MIND BOGGLED!


Finally to finish up the collection is the 'Don't Speak' 18K Gold Top Coat - Yes I did just say 18K GOLD!!!!!!!! I don't care how much it is - give it to me! I have to have it now! This a glittery top coat shade that features REAL 18K gold leave flakes mixed with iridescent gold glitter. It's so beautiful - and don't judge me but I feel super luxe knowing that my nail polish has real gold in it!!!!


So thats the entire collection - I absolutely love it! The colours are so festive and they are all something that I actually don't already have in my drawers overflowing with nail polish. They all feature something a little unique and a little edgy - much like the alluring Gwen Stefani herself!

Have you seen or picked up any of the collection? It's available everywhere that sells OPI but is limited edition so if your intrigued I would advise popping down and picking them up now! (For Australians you can purchase at Myer or David Jones, for my international babes you can buy at Ulta and anywhere else that sells OPI).

Let me know what shades are your favourite - because I'm having a hard time choosing over here!!

Hope your having an amazing day and I will speak to all soon! 
xxx


Share on:
So I think we can all agree that Ariana Grande looks absolutely smokin' in her latest music video "Love Me Harder'! There was certainly a lot of back arching, bedroom eyes and rolling around in the sand going on! It's so strange because I still see her as young and innocent...I clearly need to catch up with the times!


BUT what I was really looking at was her makeup! She had these really bold dramatic eyes with super thick winged eyeliner and massive lashes, paired with a burgundy lip! Its definitely the darkest lip I've seen Ariana wearing - but it looked so good!


The rest of her face was completely bare too - which is certainly a statement in this day and age where everyone is all about the contouring and highlighting - but it really put the focus back on the eyes and the lips!


I have recreated my own version of the makeup - complete with step by step video tutorial!

PRODUCTS USED:
Benefit Professional
L'oread True Match - W4
Sigma Persuade Cream Eyeshadow base
Too Faced Chocolate Bar Palette
Inglot AMC Gel Eyeliner - Black
L'Oreal Telescopic Mascara
House of Lashes - Iconic lash
Maybelline Fit Me Concealer - 20
Nars Crystal Transluscent Pressed Powder
Benefit Hoola Bronzer
Jordana Lip Liner - Tawny
Gerard Cosmetics Lipsticks - 1995 & Fire Engine (Use code 'JOY' for 25% off your order!)


I hope you guys enjoy the makeup and the video - let me know what you think!

xxx


Click play below to watch the video!

Share on:
Today we're getting all loved up with the Vice 3 - as you all probably know, every couple of years Urban Decay releases a new rendition of the Vice palette line and its 3rd instalment, the Vice 3, is certainly not a diappointer!

For starters it comes in pretty luxe packaging, I don't know about you guys, but I'm a total sucker for packaging - if its shiny and pretty and makes me go ooooh! then I buy it (whoops my bad!).

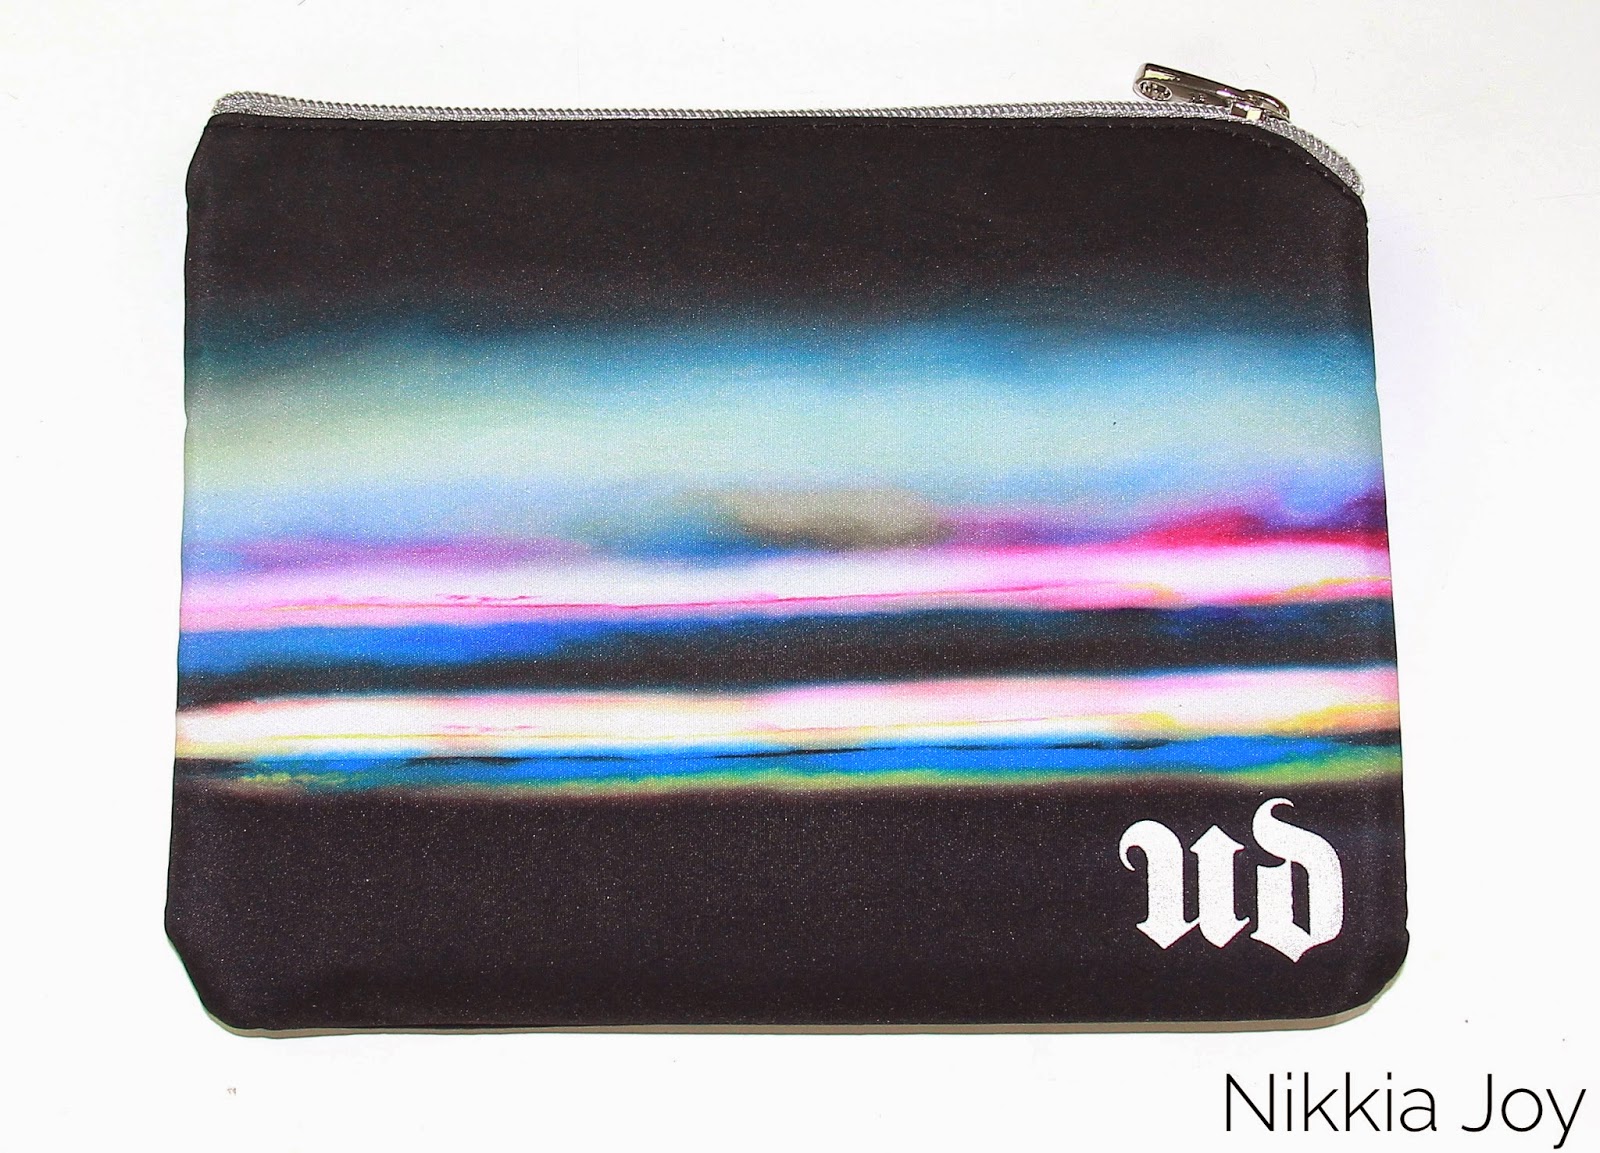
The actual palette comes inside a handy little zip up case - and they didn't skimp on this either - its thick, durable and has a sturdy zip. The gorgeous multicoloured pattern on this also makes it a complete steal! This one would be great for travel or even just storage around the home. You can keep makeup brushes, other makeup or keep your palette in there so it stays nice and clean!


I am actually obsessed with the design of the palette clutch case - it could totally double as a pencil case too!

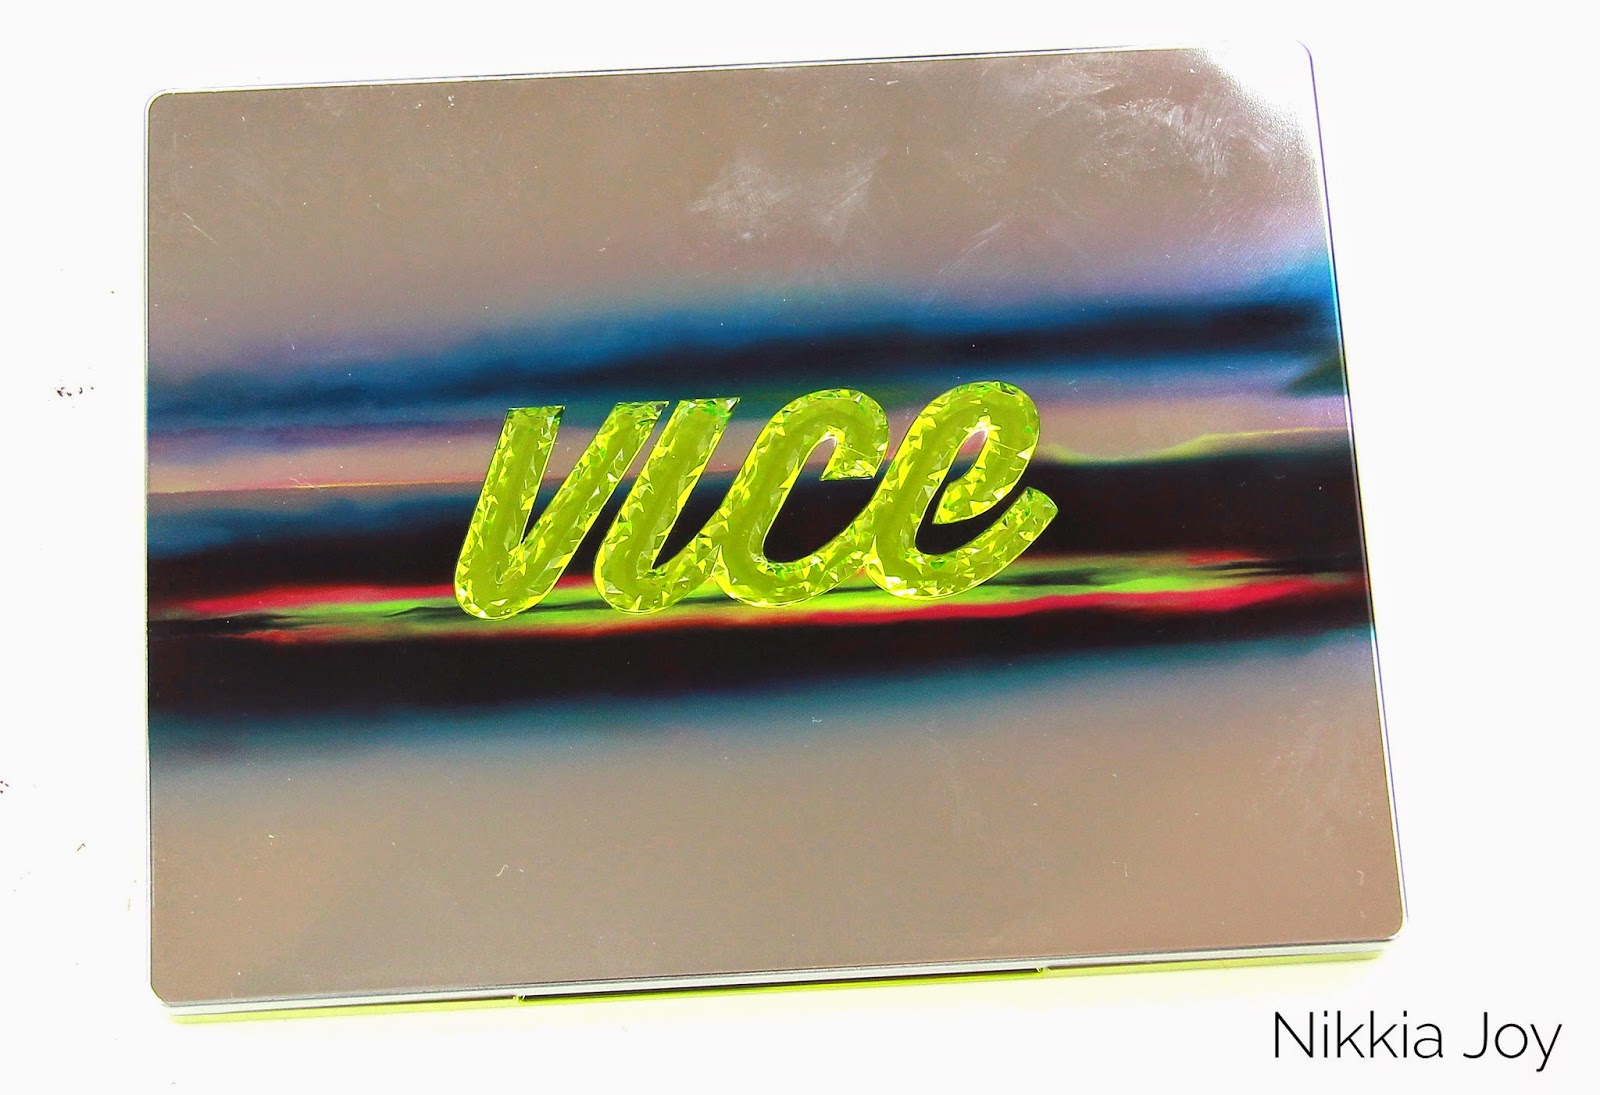
The actual palette is also completely stunning - its obvious that they put a lot of hard thought and effort into it. It's quite a sleek design, featuring a metallic outer shell with the letters 'VICE' on the front in green bejewelled writing. The front is silver with the same rainbow design printed through the middle and the back is a metallic sour green. Its really not bad to look at, and is also a lot slimmer than the previous Vice palettes.

It feels sturdy when opening and closing it - I don't feel like I could break this particularly easily. The lid also clips to the bottom - meaning you can travel without worrying!
When opening it the first thing I noticed was the generous mirror - now this I love! Have you ever been to a hotel that had terrible lighting? I always seem to wind up doing my makeup in front of window which requires a portable mirror - thank you UD you have given me gorgeous eyeshadows and a portable travel mirror for me to actually apply them - I'm impressed!


Now onto the actual shadows themselves. HOLY MOLY!! I'm going to start off with hello pigmented - the payoff of these babies is pretty incredible. You will see that in my video review and tutorial at the end of this. I advise go cautiously lol - they come out just as strong as they are in the pan. And the colour selection is also amazing. We are all loving our warm plums, pinks and oranges at the moment and they have delivered just that. Along with some great blending/transition shades and some pops of green and blue. And like every good palette should - a deep black to take any eyeshadow look from soft and flirty to bold and dramatic.

Personally I detest the little double ended brush that comes with the palette - it just doesn't give me any payoff and seems to cause quite a bit of fall out - but hey you guys might not be a fussy with brushes as I am!


Some swatches of the colours below - these are one swipe and without an eyeshadow primer - pretty impressive huh!


In terms of price its reasonably expensive - I mean its nearly double the price of some of my other favourite palettes - but at the same time its totally worth it. These are limited edition collection pieces, and they will last pretty much forever, so I don't have a problem shelling out a few extra dollars for these types of palettes.
It retails for about $90 in Australia, and $60 everywhere else (damn you Australia with your import taxes and habit of making everything cost an arm and a leg!)

You can click the links below to buy directly
Australia: http://www.discountbeautyboutique.com.au/products/urban-decay-vice3-palette
USA/Canada: http://www.urbandecay.com/vice-3-eyeshadow-palette-by-urban-decay/246.html

Overall I love it and I'm glad that I made the effort to pick this one up - I think its going to receive a lot of love and use over the years! To watch a makeup tutorial featuring the palette click play below - its just a quick and easy way to throw some of the colours together for some extra glam!


Until next time!

xxx


Share on:
So I finally got a chance to play with the Maya Mia Palette after purchasing it a few weeks back!
It really is lovely, 10 eyeshadows in a beautiful metallic african inspired casing (complete with mirror and double ended brush). The packaging is pretty sturdy too - I feel like I could throw this in my handbag or suitcase and it would survive the trip.


I think they did a really great job with the colour selection - theres pretty much something in here that you can use to create looks all the way from everyday to something really bold and smokey. They have also included a pop of turquoise and peach to change things up a bit!

The palette retails for  $29 and you can buy it directly off the Anastasia Beverly Hills website 
BUY IT HERE

The great news is they ship directly to Australia and the international shipping is fairly reasonable at $17.95 (obviously its much better value if you buy a few items).

Maya is an amazing makeup artist - I have so much respect for her and her work - so I'm happy to spend the money on something that she has been involved with creating!

Ive created a makeup look using the palette - its a neutral smokey eye with peach accents!

Let me know what you think of the tutorial!

xx


Share on:
Happy Halloween everyone!!

So for Halloween this year me & my family decided to dress ourselves up as a Zombie Bridal Party!
My sister is actually getting married in April next year - so it was kind of a mock run of the big day!

We got the outfits from a local opp shop - honestly you don't have to spend huge amounts of money on getting a costume - and then we decorated them with paint. 

To learn how to create the makeup you can watch my tutorial here: The Walking Dead | Zombie Queen Halloween Tutorial

CLICK HERE for information about the products I used to do the makeup.

Enjoy the photos! (and the ceremony)

xx


Share on:
Hi loves!

Check out my latest video featuring my new skin care routine using products from NIP+FAB. This stuff is great because its essentially high end skincare for us gals on a budget - plus it smells incredible!!

Enjoy the video! xx


Share on:
Hey everyone! Hope your having a fabulous Monday (or Sunday depending where you are) afternoon!

So today I wanted to get stuck into Halloween supplies. Walking into the Halloween/costume/party supply store can be  intimidating and completely overwhelming – there are so many shelves of stuffffff!! So I thought this quick blog post might make things a little clearer (hopefully) by giving you a little push in the right direction and showing you which products I keep in my kit!

Here is some of my work using the supplies - looking hot haiiiii!


You can also buy a lot of this stuff on eBay or through online stores. A great makeup supply store here in Australia is Scotty's
Click here to visit the online store


Paint – Face & Body
So the first basic your going to need is face paint. I keep a high quality Mehron white paint (because I know that I can rely on it for full face and body applications) and then I also keep a mixture of colored paints. You don’t have to go crazy and buy every color in the rainbow – just stick with the primary colors and then you can mix up whatever you need. So red, blue, yellow & black.  Feel free to buy additional colors – I like to keep a green on hand justr because its easier when creating bruises and bite marks.
For reference mixing the colors will give you the following results:
White + Red = Pink
Yellow + Red = Orange
Yellow + Blue = Green
Red + Blue = Purple
Black + Red = Dark red (best for blood)
When buying paints that your going to be applying to your face you HAVE to make sure they are non toxic and water based – you gotta look after your skin gurrrl!


Liquid Latex
Moving down the list we arrive at liquid latex. This stuff is insane. You can use it to do pretty much anything you want – glue your eyelids together, create wounds, texture and gouges in the skin, age yourself like 50 years – the list really goes on! I stick with Mehron – once again because I know I can trust the quality (Mehron has been supplying stage makeup and prosthetics for theatre and SFX for years and they know their stuff!). It kinda reminds me of PVA glue? Its white in the bottle but dries clear. I use it to attach texture to the skin that I can then paint over. My favorite material to attach is cotton wool – because you can pretty much mold it into whatever you need – you can also use tissue or crepe paper, rice, dry cereals, cardboard – the list again goes on. Liquid latex instructions for dummies is basically paint a thin layer on, attach the material, wait until it dries and then paint a thin layer over the top. You can continue building until you have the desired amount and then you can go right over it with paint or makeup!


Molding/Scar Wax
This is essentially like an extension of liquid latex. You use it to create ridges and textures on your face. If you want to give yourself Lady GaGa cheekbones – this is the stuff to do it! Its also great for creating really big, gory looking wounds, cuts and lacerations. Can be tricky to work with – make sure the skin your applying it to is completely clean and free of makeup and oil. I also like to heat it up over boiling water to make it super pliable and easier to mold and sculpt.


Blood
By far my most favorite supply – oozing, sticky, shiny red blood! I keep two types – a thicker jelly type known as coagulated blood. This gives the appearance of an open wound bed and is very realistic when creating hard core gore, flesh and wounds. It’s pretty much strawberry jam in a tub – yum!
I also keep a liquid form of blood. This can be used to create blood spatters, dripping blood, blood tears etc. Once again both Mehron – I find it to be the most realistic. If your looking at just using red paint as blood make sure to mix a bit of black paint in with it – human blood is a lot darker than they show it in the movies and you want it to look as realistic as possible!


I hope all of the above helped! I have included some pictures of a Zombie Queen makeup look where I have used most of the products mentioned above. If your interested in seeing them in action you can watch the video tutorial that will be up in a few days!


Talk to you soon muffins x


Share on:
  • ← Previous post
  • Next Post →

Let's be friends!

  • Remember to follow us on Instagram & Facebook!
  • Head over to our YouTube channel for step by step makeup tutorials!
  • Subscribe for email updates!
140x140

Nikkia Joy

Hi my name is Nikkia Joy and I am an Australian based fashion and beauty blogger! Click the above icons to follow me on Youtube, Instagram & Facebook for regular updates - I love chatting, so don't forget to leave me a comment to say hi!

Blog Archive

  • ▼  2016 (4)
    • ▼  21 February - 28 February (1)
      • Sukin Hydrating Facial Masque | Love it or leave it?
    • ►  14 February - 21 February (2)
    • ►  10 January - 17 January (1)
  • ►  2015 (10)
    • ►  8 November - 15 November (1)
    • ►  9 August - 16 August (1)
    • ►  26 July - 2 August (1)
    • ►  12 July - 19 July (2)
    • ►  5 July - 12 July (1)
    • ►  28 June - 5 July (2)
    • ►  21 June - 28 June (2)
  • ►  2014 (16)
    • ►  23 November - 30 November (1)
    • ►  16 November - 23 November (1)
    • ►  9 November - 16 November (1)
    • ►  2 November - 9 November (2)
    • ►  26 October - 2 November (4)
    • ►  19 October - 26 October (1)
    • ►  25 May - 1 June (1)
    • ►  18 May - 25 May (1)
    • ►  27 April - 4 May (2)
    • ►  20 April - 27 April (1)
    • ►  2 February - 9 February (1)
  • ►  2013 (4)
    • ►  15 December - 22 December (4)
latest posts
Labels
  • 1920s
  • 2016 golden globes
  • 90's lip color
  • acne
  • affordable
  • affordable foundation
  • affordable makeup
  • anastasia beverly hills
  • arabic makeup
  • ariana grande
  • ariana grande makeup
  • australia
  • bags
  • beauty
  • beauty bay
  • beauty blogger
  • beauty on a budget
  • beauty tips
  • benefits of gold on the skin
  • big lips
  • big lips no injections
  • bold eyeliner
  • bold eyes
  • bold makeup
  • bright lips
  • bronzed glow
  • budget
  • budget makeup
  • budget skincare
  • celebrity
  • celebrity inspired
  • cheap makeup
  • christmas
  • christmas gifts
  • clear acne
  • clear skin
  • colourful makeup
  • conceal
  • concealer
  • coral lips
  • correct
  • cosmetics
  • costume ideas
  • costume party
  • cover
  • cover bags
  • curing pimples
  • double wing
  • drug store
  • drugstore
  • drugstore foundation
  • dry skin
  • easy eyeliner
  • easy makeup
  • electric palette
  • evening routine
  • extraction facial
  • eyeliner
  • eyeshadow
  • eyeshadow palette
  • eyeshadow palette review
  • eyeshadows
  • face mask
  • facial
  • facial for acne
  • fake blood
  • fake wounds
  • fall makeup
  • fashion
  • fill in lips
  • flapper
  • foundation
  • foundation for summer
  • free makeup
  • gerard cosmetics
  • get ready with me
  • giveaway
  • glitter
  • glitter nails
  • glowing skin
  • glycolic acid
  • gold in skincare
  • golden globe awards
  • golden globes
  • gwen stefani
  • halloween
  • halloween costume
  • halloween makeup
  • haul
  • hide pores
  • highlighting and contouring
  • holiday collection
  • holiday palettes
  • how to
  • how to apply eyeliner
  • how to clear acne
  • hydrating
  • inglot
  • jewelled headpiece
  • kylie jenner
  • kylie jenner lip color
  • L'Oreal Infallible
  • L'Oreal Infallible 24H Matte
  • L'Oreal Infallible Pro Matte
  • lashes
  • lime crime
  • lip color
  • lip liner
  • lipstick
  • long wear
  • look awake
  • look younger
  • lorac
  • love me harder
  • MAC
  • makeup
  • makeup artist
  • makeup giveaway
  • makeup haul
  • makeup review
  • makeup tutorial
  • matte eyeshadows
  • matte skin
  • mattifying foundation
  • maya mia
  • mega pro palette
  • mehron
  • melbourne salon
  • minimize pores
  • moisture
  • moisturizing skincare
  • nail art
  • nail polish
  • naked palette
  • natural full lips
  • natural makeup
  • neutral smokey eye
  • nip and fab
  • nude lips
  • objects of affection
  • oil control
  • oily skin
  • OPI
  • OPI nail polish
  • orange concealer
  • orogold
  • overdraw lips
  • palette review
  • party
  • peach lips
  • peach makeup
  • pigment
  • plum lips
  • prizes
  • prom
  • prom makeup
  • puffy eyes
  • purple eyeshadow
  • rainbow makeup
  • red lips
  • red nails
  • reduce
  • review
  • rimmel
  • selena gomez
  • sfx
  • shine face and body
  • skin care
  • skin transformation
  • smokey eye
  • smokey eyes
  • smudge proof eye makeup
  • special effects makeup
  • stop under eye creasing
  • style
  • sukin
  • summer
  • summer glow
  • summer makeup
  • summer trends
  • swatch
  • sweat proof makeup
  • the great gatsby
  • the only one
  • the walking dead
  • tired eyes
  • trend
  • under eye circles
  • under eye darkness
  • urban decay
  • urban decay review
  • vice 3
  • vice 3 review
  • winged eyeliner
  • zombie
  • zombie makeup
latest comments
For business & PR enquiries please contact: nikkiajoybusiness@gmail.com

For business & PR enquiries please contact: nikkiajoybusiness@gmail.com

For business & PR enquiries please contact: nikkiajoybusiness@gmail.com

  • Home